Step-by-step tutorial on creating Lightning Web Component (LWC) using VS Code
Steps
1. Install Salesforce CLI
2. Install Microsoft VS
Code (Visual Studio Code)
3. Install the
Salesforce Extension Pack
4. Create a project
5. Authorize the org and
test the connection
6. Create a new
Lightning Web Component
If the first 5 steps are already
done and you authorized the Salesforce org in the VS Code IDE, proceed to step 6 to
create LWC
Step
1: Install Salesforce CLI
The Salesforce CLI is a powerful command line
interface that simplifies development and build automation when working with
your Salesforce org.
Download and install Salesforce CLI
To confirm that the Salesforce CLI is installed and
working correctly, you can open a command prompt and type sfdx. This will display the version number of the Salesforce CLI
that is currently installed on your system.
Step 2: Install Microsoft VS Code
VS Code, or Visual
Studio Code, is a free, open-source code editor developed by Microsoft. It is a
lightweight, cross-platform code editor that provides features such as
debugging, Git integration, and support for a wide range of programming
languages.
Download the version of the software that is compatible with your operating system and install it.
The following instructions are for Windows OS. Other operating systems may have slightly different steps.
Step 3: Install the
Salesforce Extension Pack
In the VS Code, go to extensions (1), Search with the Salesforce extension pack (2), select Salesforce Extension Pack from the list (3), Click the Install button (4)
The extension pack is installed successfully
Step
4: Create a project in VS Code
Press CTRL + SHIFT + P, type sfdx:
create and select SFDX:
Create Project with Manifest
Select the Standard project template
Type a project name and Click Enter
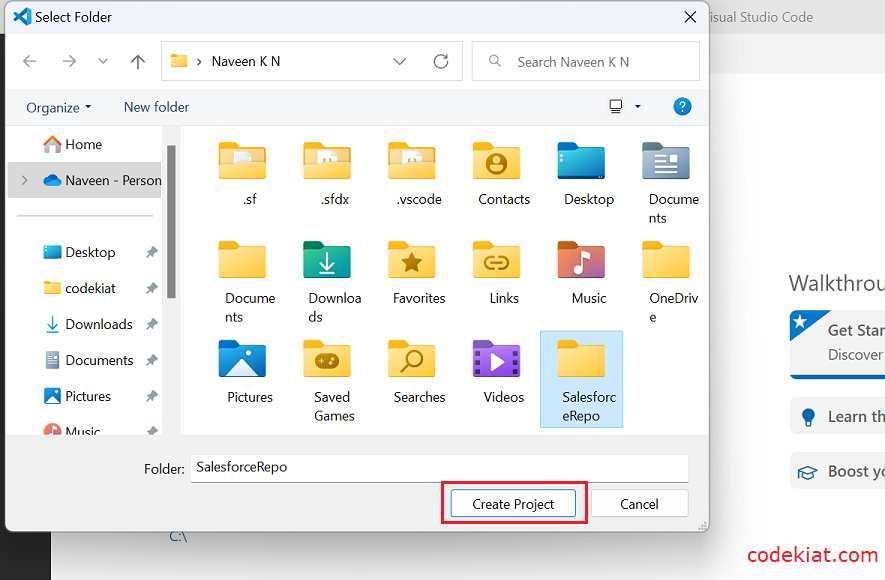
Select the folder (create a new folder if required) and click Create Project
The new project is created with package.xml
Default Package.xml contains various metadata types. I have updated Package.xml as shown below as we deal only with LWC in this article.
<Package xmlns="http://soap.sforce.com/2006/04/metadata">
<types>
<members>*</members>
<name>LightningComponentBundle</name>
</types>
<version>55.0</version>
</Package>
Step
5: Authorize an org
Establish a connection between the local project and the Salesforce instance
to retrieve and deploy the components.
Press CTRL + SHIFT + P, type sfdx: authorize, and select SFDX:
Authorize an Org from the list
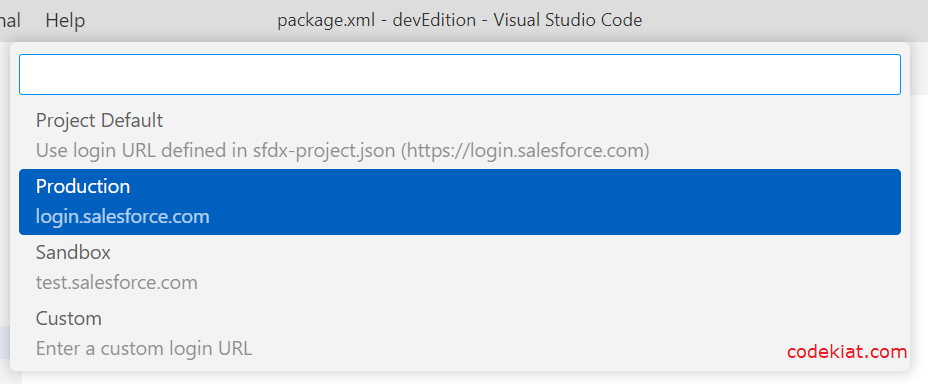
Choose your Salesforce instance. For developer edition and production instances select Production and for all other sandboxes select Sandbox
For this demonstration, I used the developer edition, hence it is Production.
Give a project name and press Enter
The Salesforce login page opens in the browser. Enter the credentials and click Log In
Upon successful authorization, you will see a below-shown message in the bottom right corner of VS Code
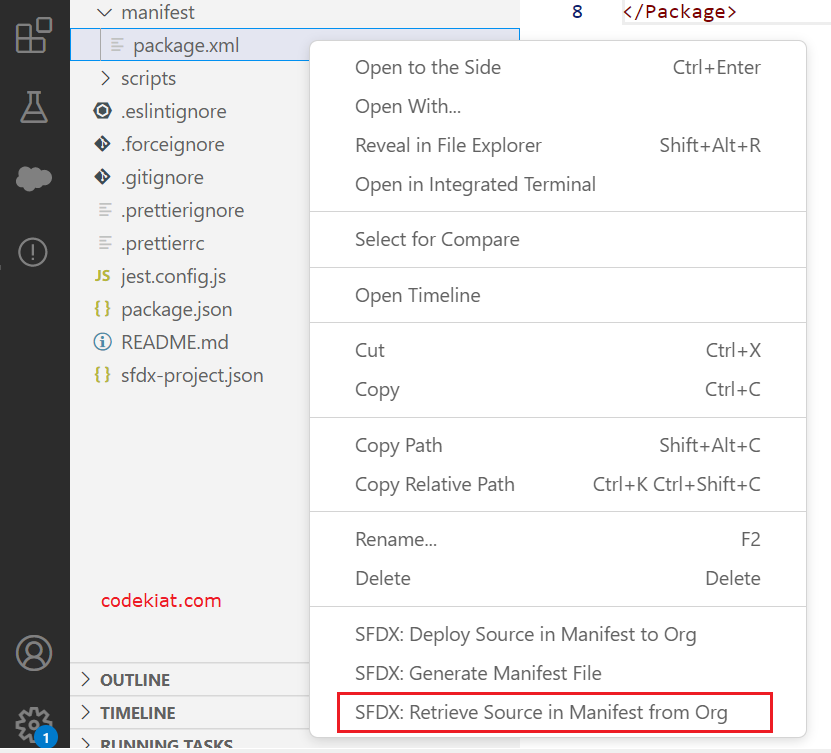
To test the connection, Right click on package.xml and Select SFDX: Retrieve Source in Manifest from Org option
As we have LightningComponentBundle in the package.xml, it will
retrieve all the lightning web components from the Salesforce Org.
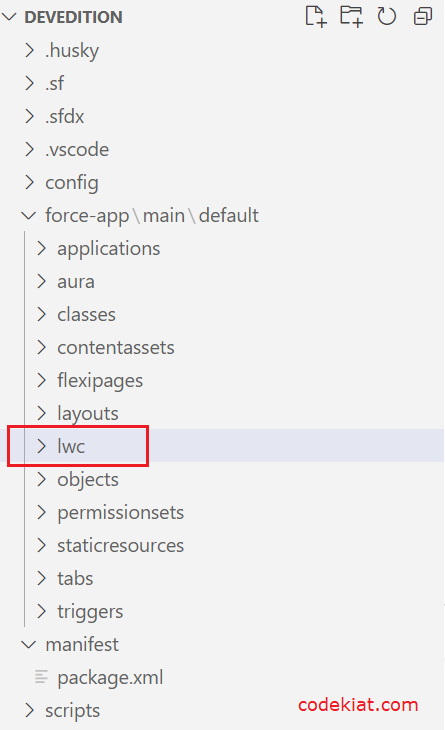
Retrieved components can be found in the indicated folder within the VS Code project.
Step 6: Create Lightning Web Component
In the VS Code, press
CTRL + SHIFT + P, type sfdx: create lightning in the search bar, and select
SFDX: Create Lightning Web Component
Give the name sampleLWC and press Enter
Choose the directory
LWC is created successfully
Copy and paste the below-mentioned code in the sampleLWC.js-meta.xml and update the apiVersion tag with the latest API version.
You can find this XML
file in the newly created component folder highlighted in the above screenshot
<LightningComponentBundle xmlns="http://soap.sforce.com/2006/04/metadata">
<apiVersion>55.0</apiVersion>
<isExposed>true</isExposed>
<targets>
<target>lightning__RecordPage</target>
</targets>
</LightningComponentBundle>
The above code change is to make LWC available in the app builder for the record
pages
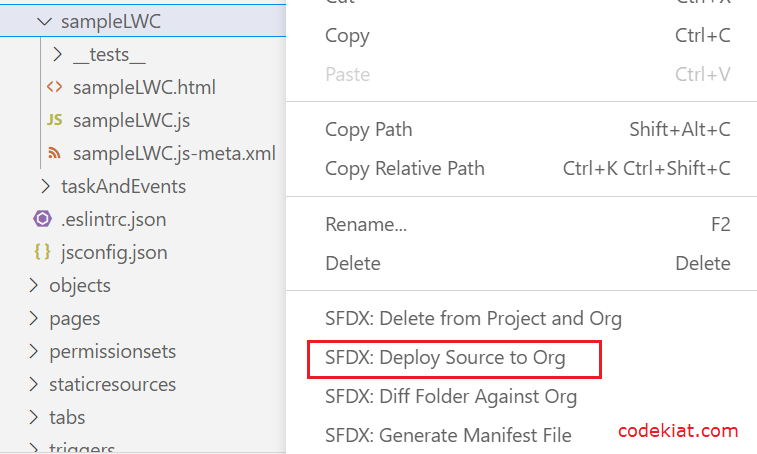
Right-click on the component
folder, and select SFDX: Deploy Source to Org to deploy the component to the
org
If you notice any issue while deploying, verify LightningComponentBundle in the package.xml (refer to step 4) and also check the connection with org (step 5)
Once the deployment
is complete, you will see the below-highlighted message in the output tab
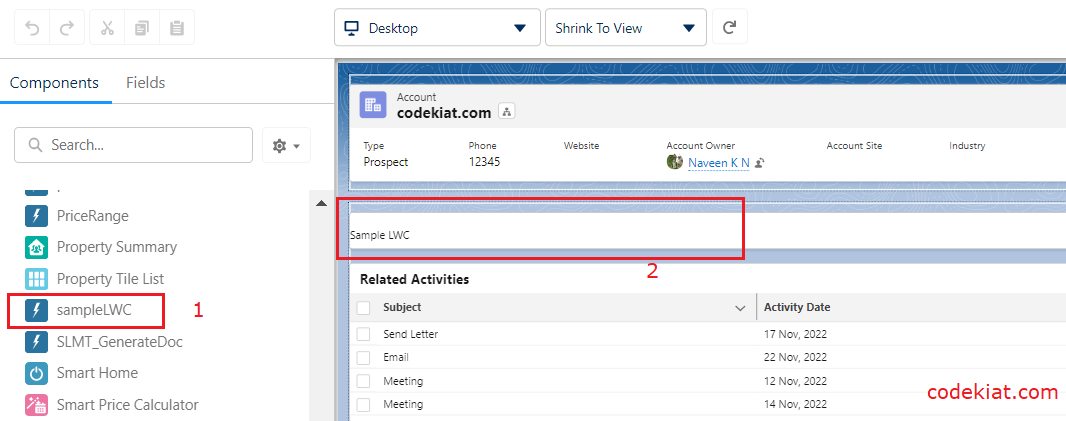
To add the newly created component to the view, Go to Salesforce > Record page > Click Gear icon at the top right corner > Select Edit page.
Drag and drop the
newly created LWC from the Custom component list (1) to the builder layout (2)
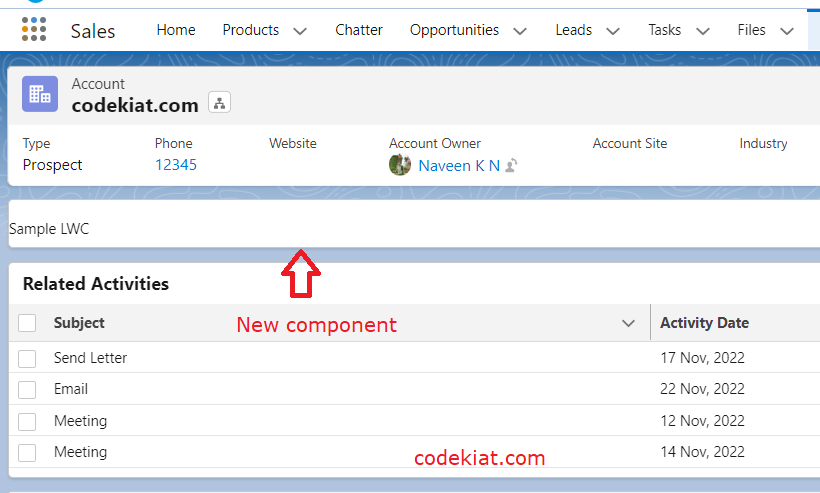
Save the record page and check the output
Wrap up
We have seen detailed
steps to set up the VS code and also created a sample lightning web component. If any
issues, please post them in the comments section below, I will do my best to help
resolve your issue.
Find detailed steps to debug the lightning web component
Consider subscribing to the community page to receive updates on upcoming blog posts.
Until then…











.png)
0 Comments