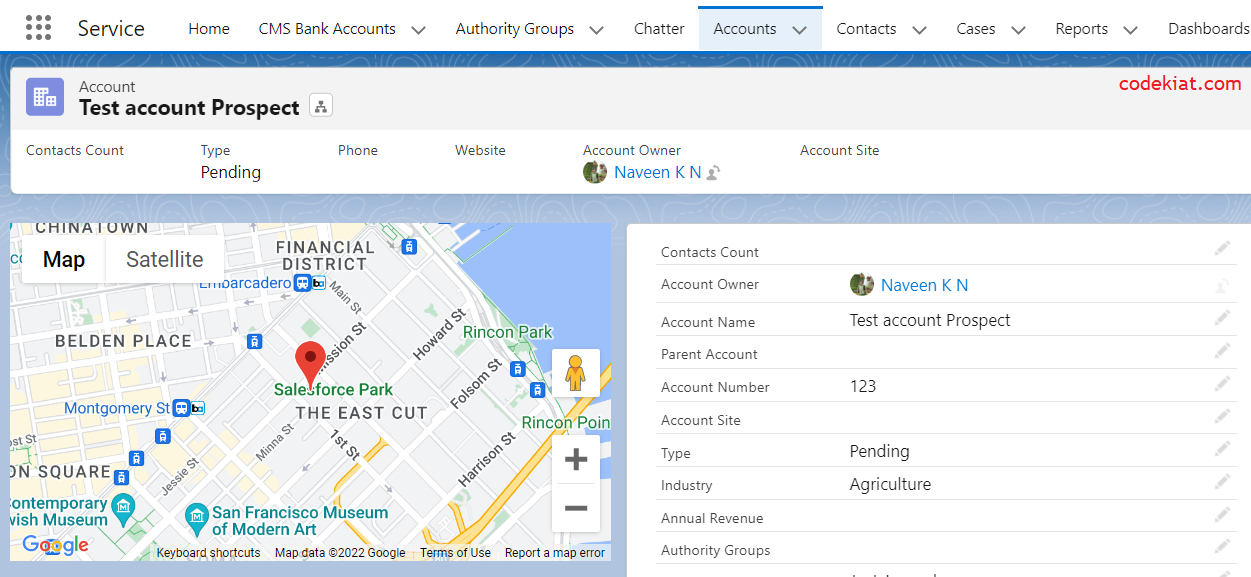
In this blog post, we see how to implement the lightning-map base component in the Salesforce lwc (lightning web component), displaying a map with a marker based on the address in the Flexi page. As part of this implementation, we have used the Lightning Data service to get the address details in JavaScript, avoiding the apex server call.
Salesforce provides a
feature called Maps and location services that use Google Maps to
display maps on standard address fields, enables the creation of Visualforce
maps, and helps users enter new addresses with autocomplete.
Check for more details to display maps in the standard page layout. Please note that we cannot show the map in the standard page layout of the developer edition as this feature is not currently supported.
What if we need to implement the map in the custom lightning web
component?
Salesforce provides a
lightning-map base component that displays a map of one or more locations using
geocoding data and mapping imagery from Google Maps. More details are below.
Create a lightning
web component
nSP_Location_Map.html
<template>
<lightning-map map-markers={mapMarkers} zoom-level="15"> </lightning-map>
</template>
nSP_Location_Map.js
import { LightningElement, api, wire, track } from 'lwc';
import { getRecord } from 'lightning/uiRecordApi';
import BILLING_COUNTRY from '@salesforce/schema/Account.BillingCountry';
import BILLING_STATE from '@salesforce/schema/Account.BillingState';
import BILLING_CITY from '@salesforce/schema/Account.BillingCity';
import BILLING_STREET from '@salesforce/schema/Account.BillingStreet';
import BILLING_POSTALCODE from '@salesforce/schema/Account.BillingPostalCode';
export default class NSP_Location_Map extends LightningElement {
@api recordId;
@track mapMarkers;
@wire(getRecord, {
recordId: '$recordId',
fields: [BILLING_COUNTRY, BILLING_STATE, BILLING_CITY, BILLING_STREET, BILLING_POSTALCODE]
})
fetchAddressDetails({data, error}){
if(data){
this.mapMarkers = [
{
location: {
Country: data.fields.BillingCountry.value,
State: data.fields.BillingState.value,
City: data.fields.BillingCity.value,
Street: data.fields.BillingStreet.value,
PostalCode: data.fields.BillingPostalCode.value
}
}
];
}else if(error){
console.log('error' + error);
}
}
}
nSP_Location_Map.js-meta.xml
<?xml version="1.0" encoding="UTF-8"?>
<LightningComponentBundle xmlns="http://soap.sforce.com/2006/04/metadata">
<apiVersion>51.0</apiVersion>
<isExposed>true</isExposed>
<targets>
<!--
<target>lightning__AppPage</target> -->
<target>lightning__RecordPage</target>
<!--
<target>lightning__HomePage</target> -->
</targets>
</LightningComponentBundle>
Add the newly created lightning web component to the record page from the app builder and test the functionality.
Result
Conclusion
If you find any issues while implementing this in your sandbox, debug the lightning web component JavaScript or post it in the comments section below.
We have seen how to
implement lightning-map based on the address field parameters. What if we have
to display multiple addresses on the map? That’s a topic of
discussion for the next article.
Until then…


0 Comments