An
explainer on how to create new users using the apex data loader in Salesforce lightning.
In
this blog post, you will learn
How to install apex data loader
Prepare CSV document
How to upload the data using data
loader
How to send password reset email alerts
to the users
How
to install apex data loader
Data
loader is a client application for the bulk import and export of the data into
the Salesforce instance.
Login
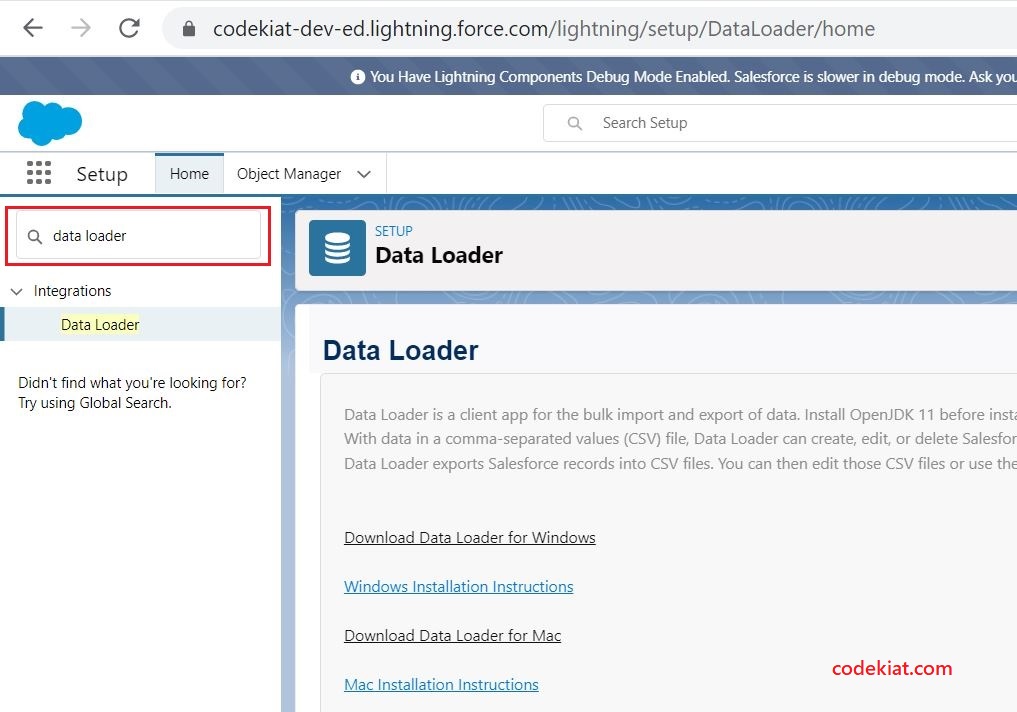
to Salesforce > go to setup
Search
with Data loader in the quick find box and click the data
loader navigation item
Click the Download Data Loader link applicable to the operating system you are using.
Follow the detailed instructions from the Installation Instructions link mentioned on the same page and
install the data loader with all its dependencies.
Prepare CSV document
Below
fields are mandatory to upload the user data from the data loader
First
Name
Last
Name
Alias
Email
Username
ProfileId
LocaleSidKey
LanguageLocaleKey
EmailEncodingKey
TimeZoneSidKey
Let us understand each field in detail
First
Name:
User first name
Last
Name:
User last name
Alias:
An alias is a
short name to identify the user on list pages, reports, or other places where
their entire name doesn't fit.
When we create a user from the Salesforce setup, the alias field is auto-filled with the first letter of the user's first name and the
first four letters of their last name. In the data import, we can use excel functions to map the
Alias name.
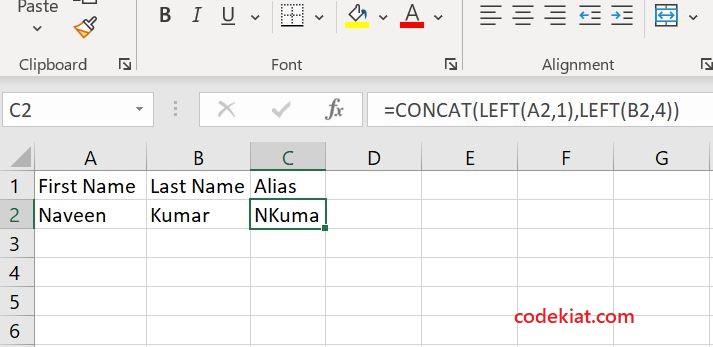
Add First Name and Last name in the first two
columns of the excel sheet (datasheet), and third column as Alias. Create a function for the Alias
column to get required letters from the first two columns as shown below.
Function: =CONCAT(LEFT(A2,1),LEFT(B2,4))
Select Alias cell (highlighted with green color in the above screenshot) and drag to copy the same formula for multiple rows.
Email:
Email Id of the user
Username:
Contains the name that a user enters to log
in to the API or the user interface (Salesforce application). The value for this field must be in the
form of an email address, using all lowercase characters. It must also be
unique across all organizations. If you try to create or update a user with
a duplicate value for this field, the operation is rejected.
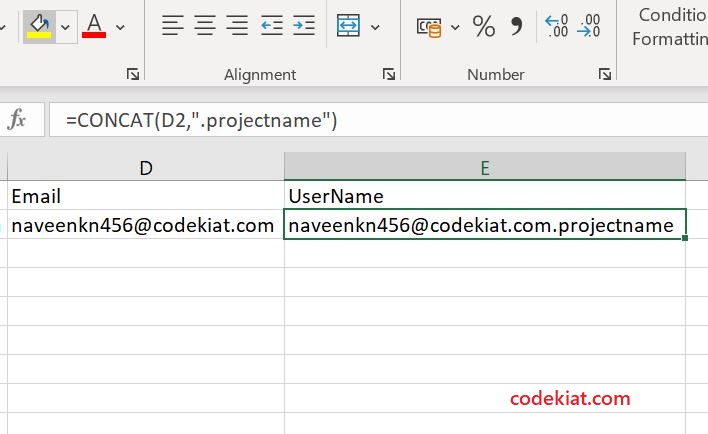
We can make use of an excel function to generate a username from the email address.
Function: =CONCAT(D2,".projectname")
You can mention the abbreviation of the
project name like .pn for Project Name to keep user names short and
sweet.
ProfileId:
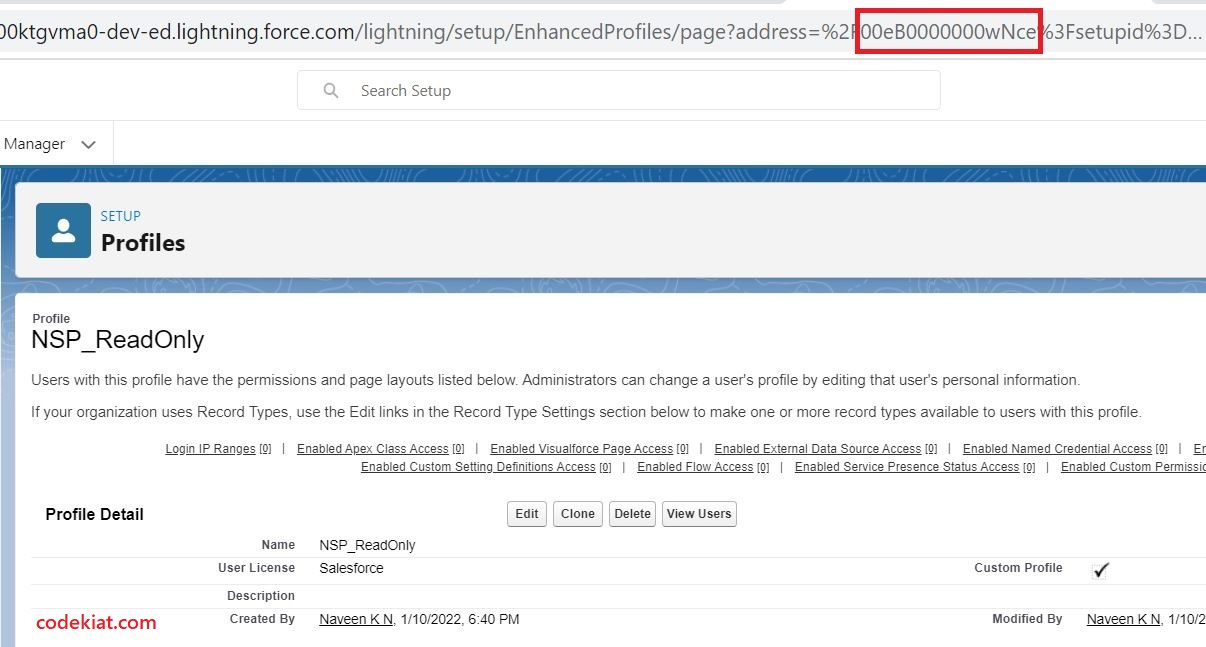
15-character Id from the URL of the profile.
In the Salesforce setup, navigate to the profiles section, go to the profile which needs to be mapped to the new users, and get the Id from the URL.
License for the user would be assigned automatically based on the profile selected.
LocaleSidKey:
Locales determine the display formats for date and time, user's names, addresses, and
commas and periods in numbers. The start day of the week for calendars varies
per locale.
You
must get the Locale from the business for each user and map its respective
LocaleSidKey in the datasheet.
Consider we got English (India) as Locale from business and in the datasheet LocaleSidKey is mapped as en_IN.
This is how it looks in the backend once the data upload operation is completed.
and Locale from the user record levelClick here to get the mapping between Locale and LocaleSidKey
LanguageLocaleKey:
This
field holds the key for the user’s application language. Get application language for each user
and map the respective LanguageLocalKey in the datasheet.
Example to see how it looks after data is inserted.
LanguageLocalKey is mapped as nl_NL.
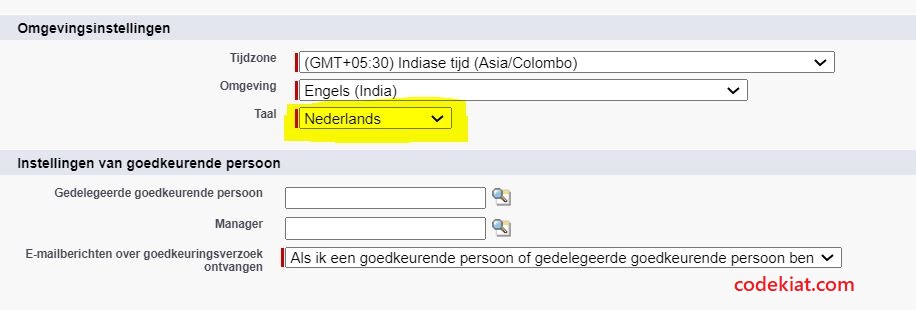
The below screenshot is from the Salesforce setup user record. User language is updated to the Nederlands and notice the language of labels.
Execute the below script in the developer console and find list of mappings between Language and LanguageLocaleKey
//code-start
Map<String,
String> languageCodes = new Map<String, String>();
for
(PicklistEntry entry :
User.LanguageLocaleKey.getDescribe().getPicklistValues())
languageCodes.put(entry.getValue(),
entry.getLabel());
system.debug(JSON.serialize(languageCodes));
//code-end
EmailEncodingKey:
Encoding
standards tell the web browser or email application how to interpret the text
characters in your HTML or the body of the email, such as an outbound email
sent from the Salesforce application. The most popular character sets
are UTF-8 and ISO-8859-1
You can query this field value for existing users in the production instance and map the same for new users. If there is any difference in email encoding for different users, find out why different email encodings are used and follow the same approach for new users.
TimeZoneSidKey:
Based
on the user time zone, get the respective TimeZoneSidKey and map it for each record
in the datasheet
Find
mapping between time zone and its TimeZoneSidKey
Other non-mandatory fields to consider
DefaultCurrencyIsoCode:
The user's default currency setting for new records.
For example, if we set DefaultCurrencyIsoCode to INR, then their default currency is INR - Indian Rupee.
Only applicable for organizations that use multiple currencies. Skip this field in case multiple currencies are not activated in your org.
How to check if multiple currencies are activated in your org?
Go
to setup > Search with company > Go to Company Information
CurrencyIsoCode and DefaultCurrencyIsoCode fields are enabled and writable only in the multi-currency org (at least as of Winter’22)
In the multi-currency-enabled org, Currency field is mandatory only when you create the user from the Salesforce setup.
When we upload the data using a data loader, if you don’t specify any of these two columns CurrencyIsoCode and DefaultCurrencyIsoCode in the datasheet, CurrencyIsoCode
is mapped with the DefaultCurrencyIsoCode of the user who is uploading the data, and DefaultCurrencyIsoCode is mapped with the org default currency.
Map DefaultCurrencyIsoCode in the datasheet only when the org
default currency is different from the uploading user default currency.
The currency field in the Salesforce setup user screen is mapped
to the DefaultCurrencyIsoCode column.
IsActive:
If
you don’t specify the IsActive field when inserting a user record from the data
loader, it will automatically be inserted as Active. In case there are no sufficient licenses in the org, you can insert the data with
IsActive as False and activate the users once licenses are available.
We have many other fields in the user object which are not mandatory for the
initial data upload. Post data upload activity, you can always update the field values either from the user interface or from the data loader using update operation with user record id as reference.
Once the field and data mapping is done, save
the excel sheet into .csv format
How
to upload the data using data loader
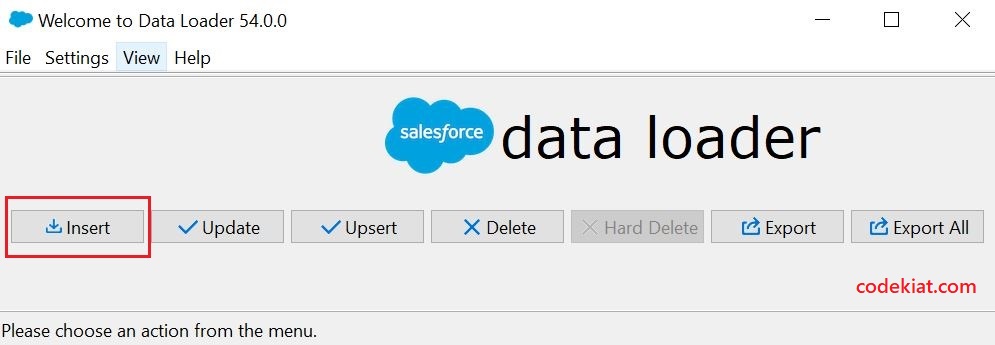
Open the Data loader and click Insert
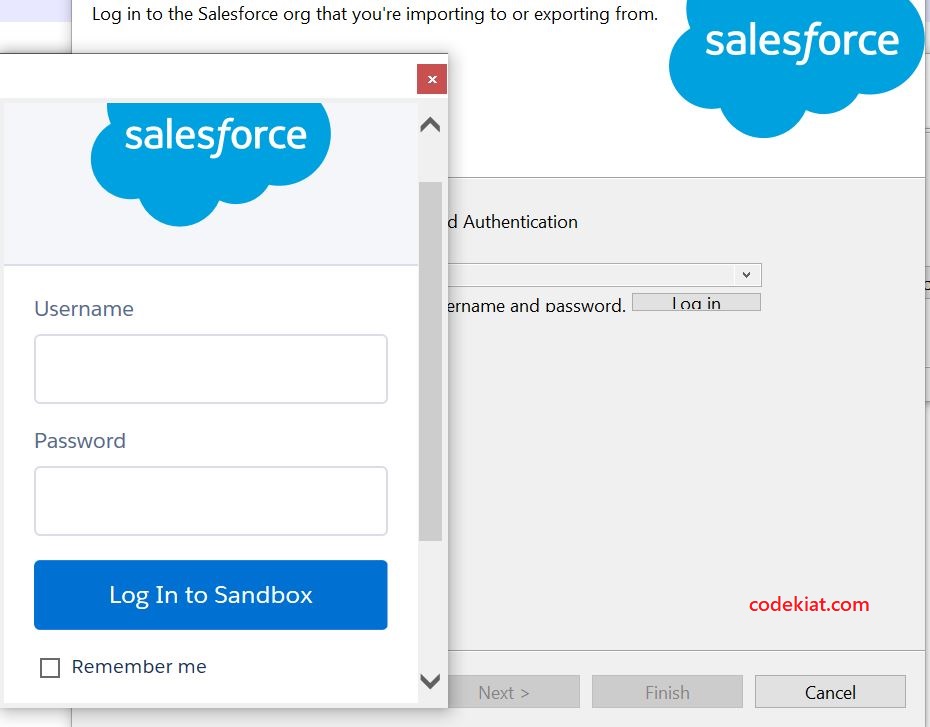
For Developer Edition and production orgs select environment as Production, and for other sandboxes select as Sandbox, then click Log
in button.
In my case, it is developer edition, hence selected as
Production
Enter the credentials in the popup and click Log In button
Notice Login Successful Message, click Next button
Select Object as User, choose .csv file created in the previous step, and click Next
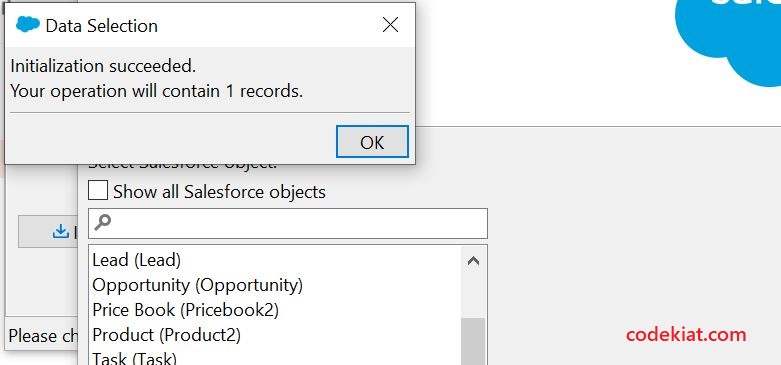
Data gets initialized, click OK to proceed to the next screen
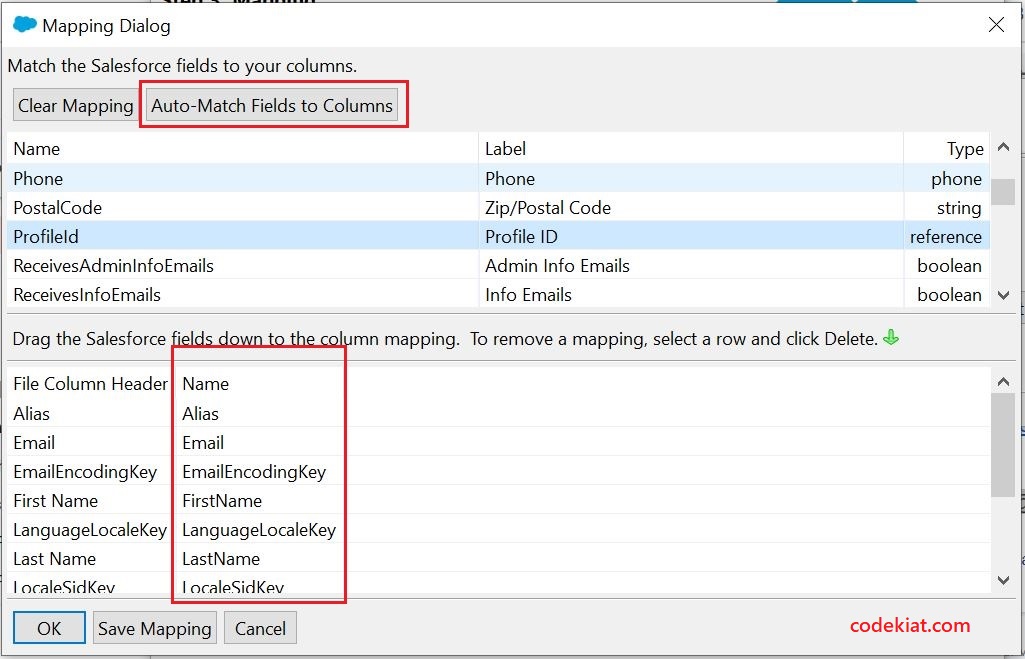
Click Create or Edit a Map button
Click Auto-Match Fields to Columns button that matches the Salesforce user object fields to columns mentioned in the .csv file.
On click of the button, fields are auto-matched (shown below)
Some fields are not auto-matched if there is any difference between the field name in the .csv file and the Salesforce user object.
Check out this example
ProfileId field is not matched. Find the ProfileId field from the top-first table, select and drag the row to the below table matching the same field.
Verify the mapping for all fields and make sure it is correct, and then click OK
Click Next
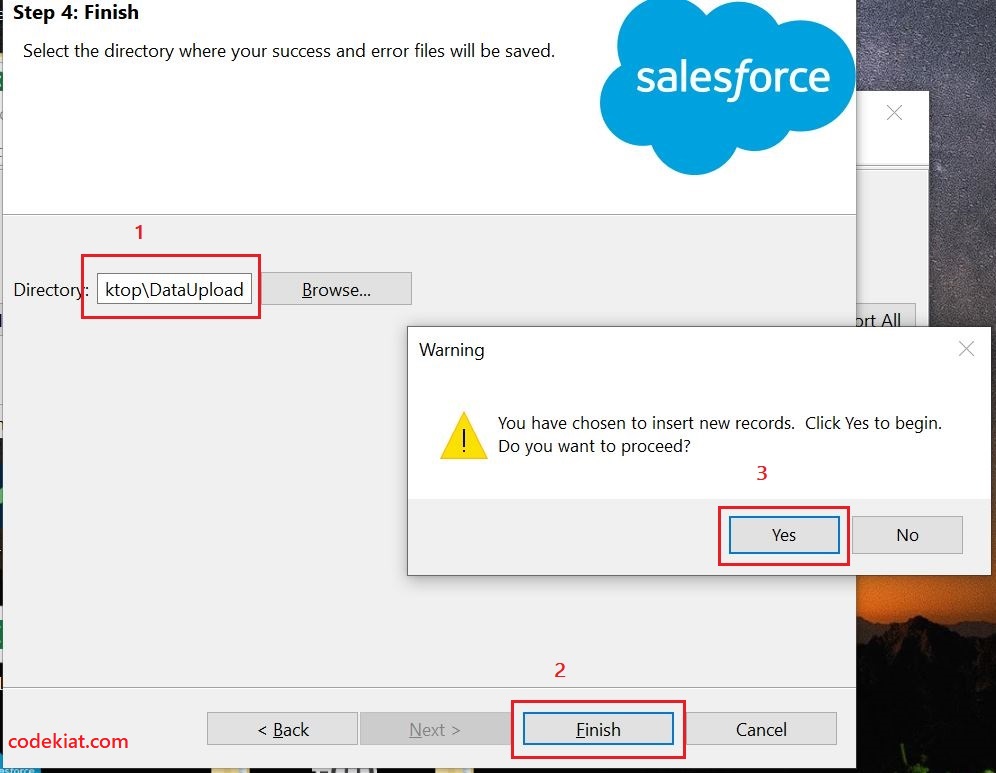
Select the folder location to save success and error
files, click Finish and click Yes to proceed
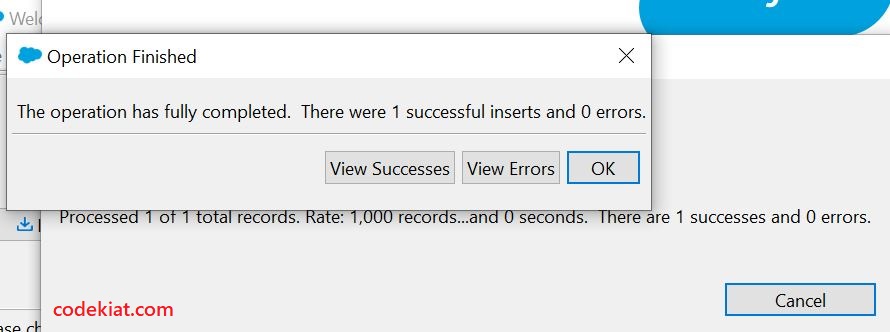
The data upload operation is finished.
Verify the success and failure logs in the folder selected. If any failures, correct the data and upload again.
Note: We have Generate
new password and notify user immediately checkbox in the user object. This field is not present in the Data Loader, hence a password is not generated with users created this way.
How
to send password reset email alerts to the users
When users are created from the user interface, if we select Generate new password and notify user immediately, it will trigger welcome emails to the users which include a link to set the password, whereas from the data loader welcome emails are not triggered when you insert user records. We must explicitly send a password reset link from the below steps.
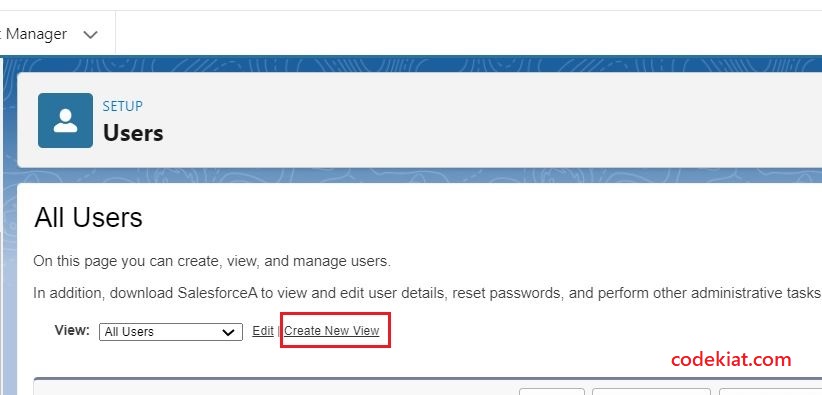
Login to Salesforce, navigate to the setup, go to the Users screen
Click
Create New View button
Fill
all the details including the filter criteria with the current date and save
Notice all the newly created users are listed.
As I have uploaded a single user, only one record is
listed.
Select
all users and click the Reset Password(s) button.
Click OK in the Reset passwords for these users popup.
That’s it!
Users
will receive a password reset email, set a password, and log in to the Salesforce instance.
Once the users confirm the successful logins, you can delete the custom view
created to filter the records.
If required, create automation with a new email template and email alert to send a welcome email to the new users. Once the welcome emails are sent, you can trigger password reset emails from the steps mentioned above.
Important considerations
- Always use exact API names from the Salesforce object while preparing the datasheet.
- Test
data-upload activity for a couple of records in the test sandbox with dummy
email ids before going to production.
- When
you get the list of users from business, verify if the user profiles are
already existing in the production by executing a query on the user object (mainly
on email id and username columns) to avoid data redundancy and to avoid
failures while inserting the data.
- When importing Portal
Users with IsActive = True, will trigger the welcome email with a link
prompting the user to set a password (no explicit password reset is required).
Conclusion
Well,
now you got a clear idea to prepare user data in the CSV format and how
to use the data loader to upload the user list. You can follow the same steps to upload other objects' data into the Salesforce instance.
If
any feedback, comments, or queries, please post them in the comments section below.
In
the upcoming post, we will discuss how to use custom labels in the Salesforce screen flow.
Until then...
Resources
Insert Users with Data Loader (salesforce.com)
Locales Overview (salesforce.com)
Set up 'email encoding' (salesforce.com)













.png)
0 Comments